


This Orange Creamsicle Cheesecake is the perfect no bake dessert for your next gathering. It's smooth and creamy and has all the orange creamsicle flavors you love.
The crust is made with Nilla wafers—another nostalgic flavor that tastes so good with the creamy orange filling. It can be frozen rather than baked, making this a true no bake treat.
Jump to:
Orange Creamsicle Cheesecake
If you’re a sucker for an orange creamsicle, this no bake Orange Creamsicle Cheesecake is everything you’ve hoped for and more. It's got rich, creamy cheesecake flavors combined with the bright freshness of an orange. The light and fluffy texture is similar to Sicilian cheesecake (aka the Olive Garden Cheesecake made with ricotta cheese).
Another bonus to this Orange Dreamsicle recipe is that you don’t even have to turn on your oven. There is an extra step of blending up the orange juice and orange zest but aside from that, it’s an easy peasy homemade dessert with irresistible flavors and textures.
Key Ingredients
- Fresh oranges: you'll need both the juice and zest from fresh oranges.
- Milk: this is for making the pudding mixture so I recommend using whole milk so that it is extra creamy.
- White Chocolate Pudding: you will need one 3.4 oz box for the filling.
- Cream Cheese: make sure that your cream cheese is soft before trying to make the filling.
- Powdered Sugar: this sweetens the filling without adding any grittiness.
- Whipping Cream: you will need this to lighten the filling. Make sure it is nice and cold before you try and whip it.
- Orange Extract: this is optional but really gives the orange flavor a boost.
- Nilla Wafers - you will need about 3 cups of Nilla Wafers cookies to make about 1 ½ cups of crushed cookies for the crust.
How to Make Orange Cream Cheesecake
- Beat the whipping cream until soft peaks form.
- In a blender, blend the orange zest and orange juice together until the zest is well blended. (this will ensure your cheesecake is nice and creamy, and you don't have chunks of orange zest.) Set aside.
- Beat the cream cheese with an electric mixer until light, fluffy, and smooth in a separate bowl. Add in the milk/pudding mixture. Beat until creamy.
- Add powdered sugar, and then add the vanilla and orange extract.
- Fold the whipped cream into the cream cheese mixture.
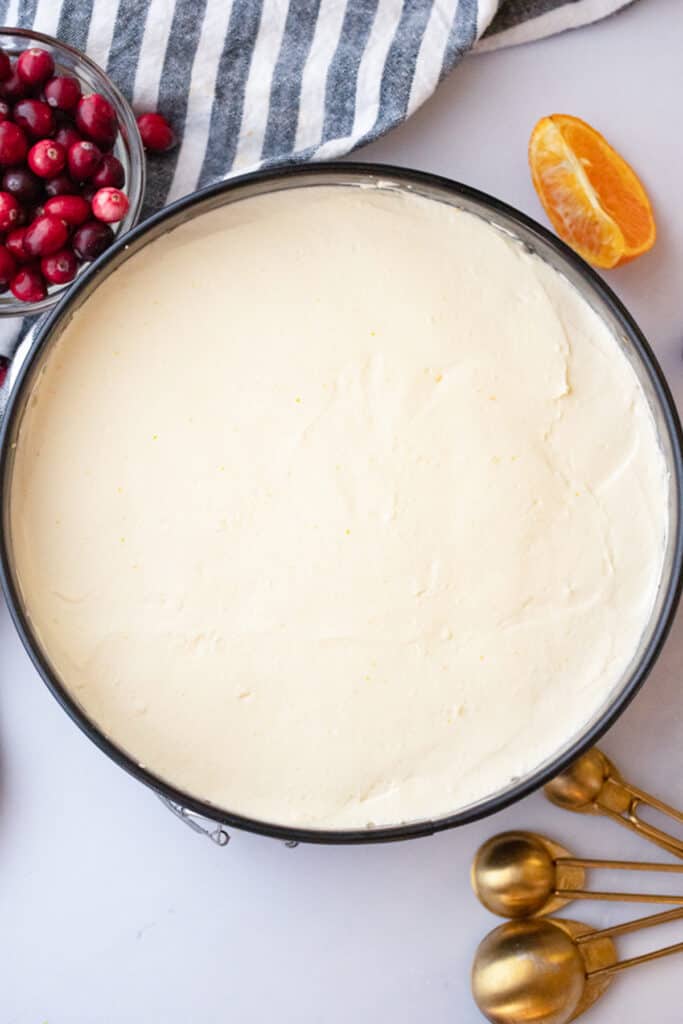
- Pour mixture into the prepared Nilla Wafer Crust. Smooth out the top with the back of a spoon.
- Refrigerate for a couple of hours or until the pie is set. Your cheesecake is ready to serve.
Frequently Asked Questions
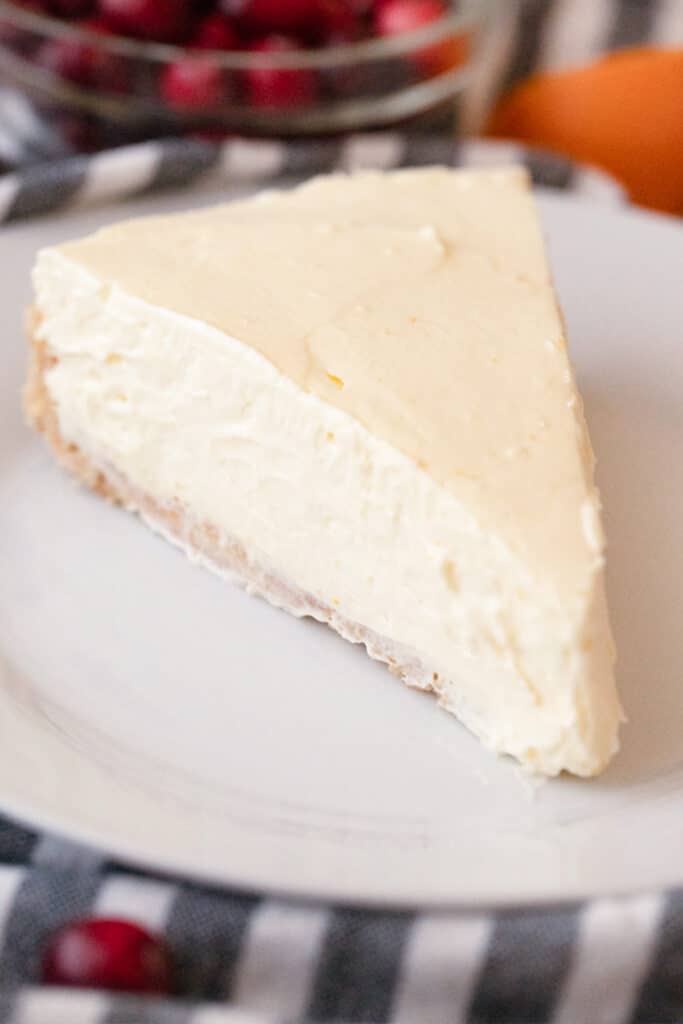
I also make this Orange Cream Cheesecake with a 9” springform pan. You can also use a regular 9” deep pie plate for this recipe. If you plan to make it in the springform pan, you only need to take the crust up halfway on the pan when patting the crust into the pan.
It’s actually really pretty to have the edge of the creamsicle pie half cheesecake filling and half cookie crust. It makes such a beautiful orange creamsicle pie.
No Bake Orange Creamsicle Cheesecake Recipe
Ingredients
Creamsicle Cheesecake Mixture
- 3 tablespoon Orange Zest
- ½ Cup Orange Juice
- 1 Cup Milk
- 1 3.4 oz Box White Chocolate Pudding
- 8 oz Cream Cheese
- ½ Cup Powdered Sugar
- 1 ½ Cups Heavy Whipping Cream
- 1 tsp Pure Vanilla Extract
- 2 tsp Orange Extract
Nilla Wafer Crust
- 1½ Cups Crushed Nilla Wafers (3 cups Nilla Wafers makes 1 ½ cups crushed)
- ⅓ Cup Sugar
- 6 tablespoon Butter
Instructions
For the Cheesecake Mixture
- In a large mixing bowl (or electric mixing bowl, I like to use my Kitchen Aid or Bosch for this recipe) beat the whipping cream until soft peaks form.
- Wash and dry a large orange. Use a zesting tool or fine grater to zest the orange.
- In a blender, blend together the orange zest and orange juice until the zest is well blended. (this will ensure your cheesecake is nice and creamy and you don't have chunks of orange zest.) Set aside.
- In a separate bowl, beat the cream cheese with an electric until light, fluffy, and smooth. Add in the milk/pudding mixture. Beat until creamy.
- Add powdered sugar, vanilla extract, and orange extract.
- Gently fold the whipped cream into the cream cheese mixture.
- Pour mixture into the prepared Nilla Wafer Crust. Smooth out the top with the back of a spoon.
- Refrigerate for a couple of hours or until the pie is set. Serve.
For the Nilla Wafer Crust
- Use a food processor to mince your Nilla Wafers into crumbs. You will want about 1 ½ cups of Nilla Wafer crumbs for a 9" pan. (This should be about 3 cups of whole Nilla Wafers).
- Add the ⅓ cup of sugar to the Nilla Wafer Crumbs.
- Melt your butter and add it to the crumb mixture.
- Toss the mixture with a fork. It does a better job of combining all the ingredients. The mixture should resemble wet sand. When you squeeze some in your hand it should keep its shape but crumble just a little.
- Use the back of a spoon, the flat bottom of a measuring cup or your hands to press the graham cracker mixture into a 9" springform pan. Be sure to try and get the sides even first and then press the remaining crumbs into the bottom of the pie plate.
- To finish the Nilla Wafer crust, to make sure it doesn't crumble and will hold it's shape while being served, bake the crust in a 350-degree oven for 12-14 minutes. You can also freeze the Nilla Wafer crust for about 30 minutes. This method works great too and just firms up the butter.
Nutrition
More No Bake Cheesecake Recipes
- No Bake Cheesecake Bars
- No Bake Mini Cheesecakes
- Nutella Cheesecake
- No-Bake Pumpkin Cheesecake
- No-bake Chocolate Cheesecake
- Mini Pumpkin Cheesecake
- No Bake Lemon Cheesecake
- Classic No-Bake Cheesecake
- No Bake Chocolate Cheesecake Dip
More Orange Creamsicle Dessert Recipes
- Orange Dreamsicle Cookies
- No-Bake Orange Creamsicle Cheesecake
- Homemade Sweet Orange Rolls with a Dreamsicle Orange Frosting
- Orange Dreamcicle Sugar Cookie Bars
- Sugar Cookie Bars with Blood Orange Cream Cheese Frosting
This no bake Orange Creamsicle Cheesecake is the perfect no-bake cheesecake for your next gathering. It's smooth and creamy and has all the orange dreamsicle flavors you love. It's the perfect dreamsicle dessert!
Leave a Reply