


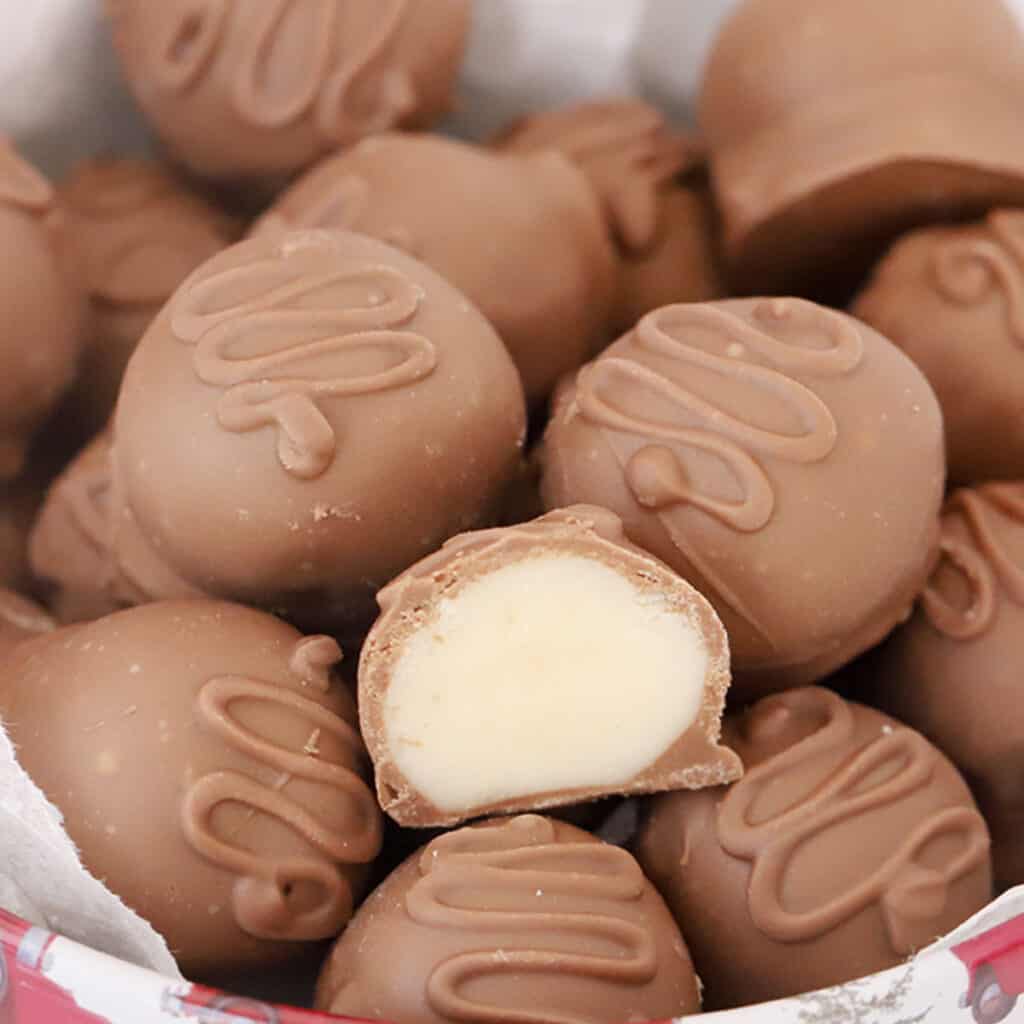
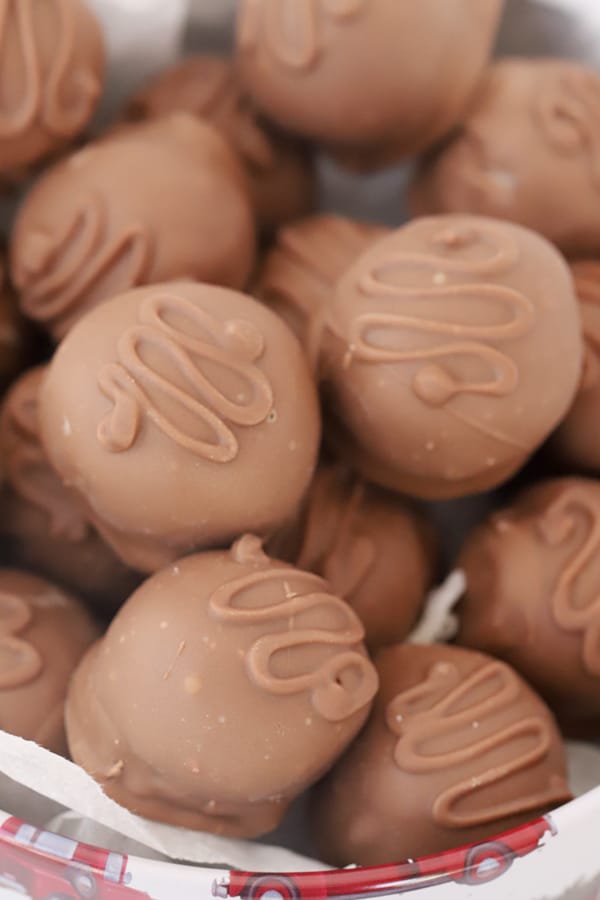
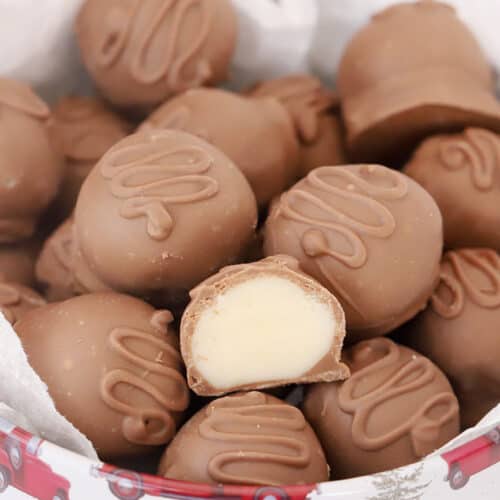
These Chocolate Covered Coconut Balls are creamy, chewy, chocolatey, and easy to prepare in your very own kitchen. They make an impressive addition to your cookie plate during the holiday season and are often the first thing to disappear!
The center of these coconut candy balls is made by cooking cream and sugar to create a mixture that is soft and chewy. For the outside, we dip each in tempered chocolate and give it a little decorative drizzle.
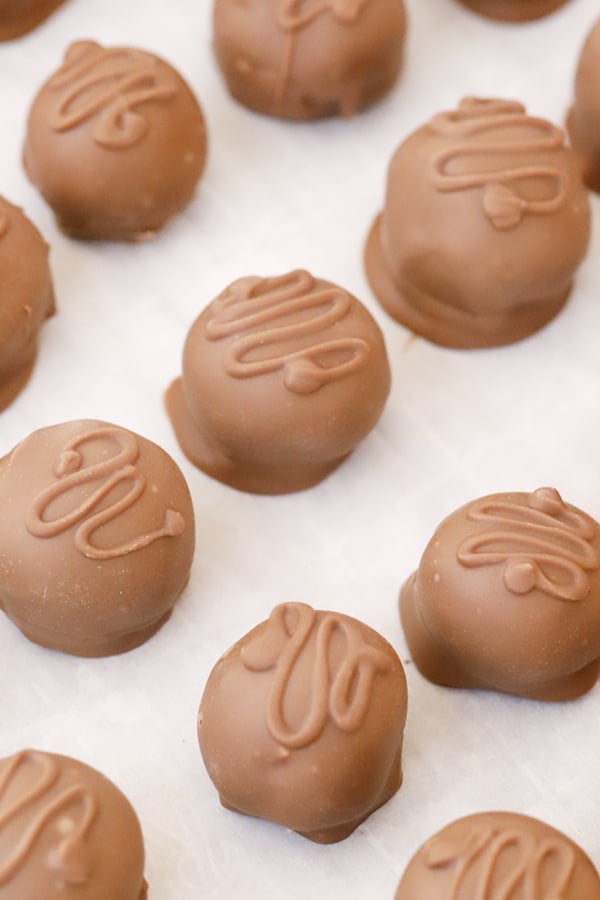
Chocolate Covered Coconut Balls
Chocolate and coconut are a match made in heaven and I am always looking for new ways to enjoy these flavors. This recipe for chocolate covered coconut balls has got to be up there as one of my favorites. It’s part chocolate truffle, part homemade Mounds bar, and 100% delish!
I won’t go claiming this is the easiest recipe out there because to be frank, it isn’t. But, I believe in you and would never post a recipe that we don’t think is entirely doable for the home cook. This one just takes a bit more time, temperature taking, and patience than some others.
Might I add, it is so worth it! I have also given you complete step-by-step instructions on how to make this chocolate-covered coconut candy the “easy” way and the “hard” way so you have options. I’ve also provided plenty of answers to frequently asked questions, such as what chocolate to use and even where to buy it!
Let’s get dipping!
Trader Joe’s has a one or two pound chocolate bar that works perfectly for this recipe. For a full guide on how to melt different kinds of chocolate, be sure to check out our guide to melting chocolate.
Email This Recipe
Get a link to this recipe emailed so you can save it for later + get all the latest Carefree Kitchen recipes!
By submitting this form you consent to receive emails from The Carefree Kitchen
And if you’re looking for more homemade candy recipes, be sure to check out our homemade Peppermint Patties, Peppermint Pretzels, and our Buckeye Balls too.
Key Ingredients
- Heavy Whipping Cream – any type of heavy whipping cream will work.
- Butter – we typically use unsalted butter for this recipe, but you can use either salted or unsalted, depending on the flavor profile that you are going for.
- Sugar – regular white granulated sugar.
- Corn Syrup – this helps ensure that the candies do not crystallize.
- Coconut Extract – you may find this at the grocery store, or otherwise you will be able to easily find online.
- Shredded Coconut – this is optional, but really boosts the coconut flavor and adds a great texture. We recommend using unsweetened shredded coconut if you can find it.
- Chocolate for Dipping – you can choose from a wide variety of different types, flavors and brands of chocolate for dipping your candies. Check out the Frequently Asked Questions section for more!
How to Make Coconut Chocolate Candy Balls
- Cook the sugar mixture. In a heavy saucepan, add heavy whipping cream, butter, sugar, corn syrup and salt. Heat over medium heat while stirring and bring to a boil. If you notice any sugar on the sides of your saucepan, use a pastry brush and a little water to brush the sides so they are clean. When the sugar mixture starts to boil, clip a candy thermometer to the side of the pan and continue stirring and cooking until the mixture reaches 236 degrees F (soft ball stage).
- Transfer to a mixing bowl. Once it gets to 236 degrees F, remove the pan from heat and pour into the bowl of a stand mixer. Do not scrape the bottom of the pan (this will help prevent crystallization). Let the sugar mixture cool to room temperature, then using the paddle attachment, mix on low for about 15 minutes. The sugar mixture will go from a slightly runny and glossy texture to a play dough texture and it will retain its shape. Once it has reached the desired consistency, stop the mixer and remove fondant from the bowl.
- Flavor. Add the coconut flavoring and shredded coconut (if desired) and mix in until well combined.
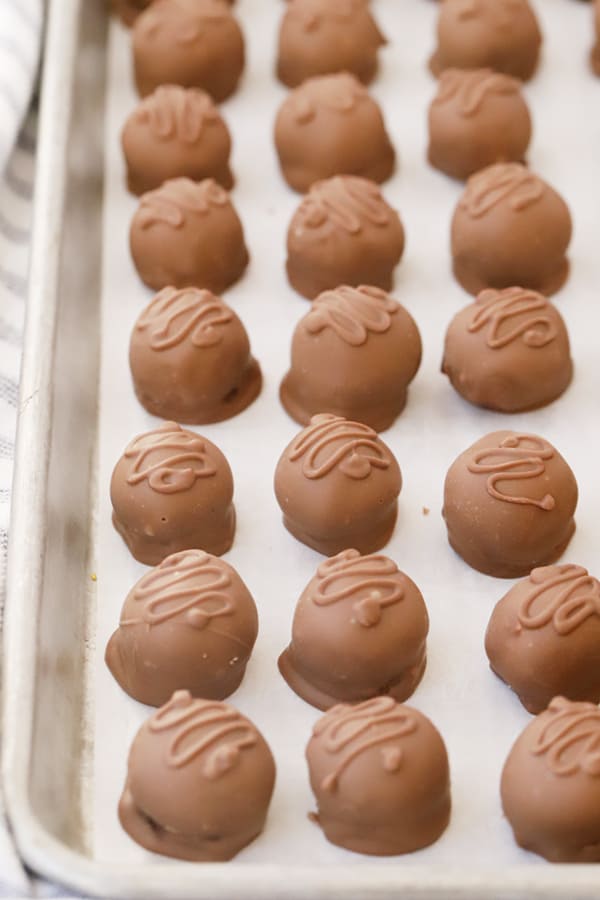
- Cut and shape pieces. Roll into 3-4 long, thin cords then use a knife to cut into even bite-size pieces that are about 3/4″ – 1″. Roll into balls then place onto a baking sheet lined with parchment paper. You can use a bit of powdered sugar or butter on your hands to prevent sticking if needed.
- Use now or store. Transfer to the fridge for about 1 hour, or until no longer warm and hard enough to dip into chocolate.
How to Dip Chocolate Covered Coconut Balls
- Prepare chocolate. Prepare your desired dipping chocolate by either melting coating chocolate or tempering high quality chocolate (SEE NOTES!) and place into a large bowl.
- Dip. Add each rolled fondant ball to the prepared chocolate, dipping each ball one at a time. Use a fork to drizzle and cover fondant with chocolate, then lift the ball out and tap the fork on the side of the bowl to remove excess chocolate. Lightly scrape the bottom of the fork on the side of the bowl to remove more excess from the bottom of the fondant and use a butter knife or offset spatula to help slide the fondant from the fork to the parchment paper or wax paper. Once you have dipped all of your chocolates, you can go back and add a little drizzle over the top of each for decoration.
- Let set and store. Let the chocolate harden in a cool place, then once it has completely set up your candy can be stored in an airtight container in the fridge for up to 2 months.
Coconut Ball Variations
Once you’ve made the classic version, try one of these fun twists:
- Almond Joy style. Press a whole roasted almond onto each coconut ball before dipping in milk chocolate.
- Dark chocolate. Dip in dark chocolate for a richer, less sweet candy that tastes just like a Mounds bar.
- White chocolate. Dip in white chocolate and sprinkle with toasted coconut for a snowball look.
- Toasted coconut. Toast the shredded coconut until golden before stirring it into the filling for a deeper, nuttier flavor.
- Coconut patties. Press the filling into flat 1½-inch rounds instead of balls before dipping.
- Holiday sprinkles. Top each piece with festive sprinkles or a pinch of flaky sea salt while the chocolate is still wet.
- Cherry. Wrap a little filling around a well-drained maraschino cherry before dipping, like a coconut cherry cordial.
Love homemade candy? Try my Peppermint Patties or Chocolate Covered Caramel.
Frequently Asked Questions
If you choose to temper your chocolate, you are going to need to buy a higher-quality chocolate couverture. Couverture chocolate basically means that it has a higher percentage of cocoa butter solids, therefore making it possible to temper. We have provided basic home tempering instructions below
So where can you find couverture chocolate? Well, quite a few places actually. In fact, your local grocery store probably carries it and you don’t even know it! Have you noticed chocolate bars or bags of chocolate that have a percentage written on them? Without getting too scientific, that percentage is referring to the amount of cacao mass (i.e. the cocoa liquor and the cocoa butter).
At the grocery store you are likely to find brands like Ghirardelli, Godiva and Guittard. Some stores, like Trader Joe’s and Whole Foods, carry their own store brand couvertures. You will also likely find various local chocolate companies that sell their chocolate bars at your local grocery stores.
If you want to make a large amount of chocolates, you can also find online shops where you can buy chocolate coins for tempering. Worldwide Chocolate carries a huge line of professional chocolates that you can choose from, such as Felchlin, Cacao Barry, Valrhona and Callebaut.
Using coating chocolate is by far the easiest method as all you need to do is melt and dip. It’s virtually foolproof, unlike tempering chocolate which takes quite a bit of practice to do correctly.
You shouldn’t normally need to thin down chocolate. However, if you happen to heat melting chocolate a little too much, it can begin to seize up. In order to save it, one solution is to add a small amount of melted coconut oil. This tiny amount of extra fat will help thin down the chocolate making it dippable again.
Chocolate chips are made to hold their shape, so on their own they melt thick and set soft. For the best results, use melting wafers or tempered chocolate. In a pinch, melt chocolate chips with 1 teaspoon of coconut oil per cup to thin them out, and store the finished candy in the fridge.
The sugar mixture most likely wasn’t cooked hot enough. Use a candy thermometer and cook it to 236–238°F. If the filling is still soft after mixing, chill it for 30 minutes, or knead in a little powdered sugar until it holds its shape.
Sugar crystals can form if sugar sticks to the sides of the pan or the mixture gets stirred too much while it cools. Brush down the sides of the pan with a wet pastry brush while it cooks, and don’t scrape the pan when you pour it out.
Yes, for this recipe. The temperature makes the difference between a soft, creamy filling and one that’s too runny or too hard. A clip-on digital thermometer is the easiest to use.
Yes! Unsweetened coconut keeps the filling from getting too sweet, but sweetened shredded coconut works fine too and gives a softer, more Mounds-like texture.
Store them in an airtight container in the fridge for up to 2 months, so they’re perfect for making ahead for holiday trays and gifts.
Yes! Freeze them in a single layer, then transfer to an airtight container for up to 3 months. Thaw them in the fridge overnight to keep condensation from spotting the chocolate.
How to Temper Chocolate for Chocolate Covered Coconut Balls
If you are up for a challenge, here are instructions for how to temper chocolate at home. This is not the easiest technique, so don’t get too frustrated if it doesn’t turn out perfectly right away! Just like anything, it takes practice.
- Prepare the chocolate. Choose high-quality couverture chocolate and chop into small pieces if needed. Set aside ⅓ of the chocolate.
- Melt the chocolate. Gently melt the remaining ⅔ using a double boiler or microwave in 30-second intervals, stirring frequently. Heat white or milk chocolate to 113°F and dark chocolate to 118°F.
- Cool and seed. Transfer the melted chocolate to a clean bowl and let cool for about 5 minutes. Gradually stir in the reserved chocolate, a little at a time, until melted and the temperature drops to 79°F.
- Reheat gently. Warm the chocolate back to 86–90°F using a double boiler for a few seconds at a time or a hair dryer on low heat. Stir frequently until smooth, being careful not to overheat.
- Test the temper. Dip a butter knife or spoon into the chocolate and let it sit at room temperature. It should set within 5–10 minutes with a shiny, streak-free finish.
- Use immediately. Once properly tempered, the chocolate is ready for dipping.
Chocolate Covered Coconut Balls
Ingredients
- 2½ cups heavy whipping cream
- 6 cups sugar
- 1/4 cup butter
- 3 tablespoons corn syrup
- 1/8 teaspoon salt
- 1-2 teaspoons coconut extract
- 1 cup shredded coconut
- 1½ pounds chocolate
Instructions
- In a heavy saucepan, add heavy whipping cream, butter, sugar, corn syrup, and salt. Heat over medium heat while stirring and bring to a boil. If you notice any sugar on the sides of your saucepan, use a pastry brush and a little water to brush the sides so they are clean.
- When the sugar mixture starts to boil, clip a candy thermometer to the side of the pan and continue stirring and cooking until the mixture reaches 236 degrees F (soft ball stage).
- Once it gets to 236 degrees F, remove the pan from heat and pour into the bowl of a stand mixer. Do not scrape the bottom of the pan (this will help prevent crystallization).
- Let the sugar mixture cool to room temperature, then using the paddle attachment, mix on low for about 15 minutes. The sugar mixture will go from a slightly runny and glossy texture to a play dough texture and it will retain its shape. Once it has reached the desired consistency, stop the mixer and remove fondant from the bowl.
- Add the coconut flavoring and shredded coconut (if desired) and mix in until well combined.
- Roll into 3-4 long, thin cords then use a knife to cut into even bite-size pieces that are about 3/4" – 1". Roll each piece into a ball then place onto a baking sheet lined with parchment paper. You can use a bit of powdered sugar or butter on your hands to prevent sticking if needed.
- Transfer to the fridge for about 1 hour, or until no longer warm and hard enough to dip into chocolate.
How to Dip Chocolates
- Prepare your desired dipping chocolate by either melting coating chocolate or tempering high quality chocolate. *Add each rolled fondant ball to the prepared chocolate, one at a time.
- Use a fork to drizzle and cover fondant with chocolate, then lift the ball out and tap the fork on the side of the bowl to remove excess chocolate.
- Lightly scrape the bottom of the fork on the side of the bowl to remove more excess from the bottom of the fondant and use a butter knife or offset spatula to help slide the fondant from the fork to the parchment paper. Once you have dipped all of your chocolates, you can go back and add a little drizzle over the top of each for decoration.
- Let the chocolate harden in a cool place, then once it has completely set up your candy can be stored in an airtight container in the fridge for up to 2 months.
Notes
Nutrition
Did you make this?
Don’t forget to leave a rating below and make sure to follow on Pinterest, Instagram and Tiktok for more!
More homemade chocolate candy recipes
- Saltine Cracker Toffee
- Buttery English Toffee
- Nutella Balls
- Peanut Butter Balls
- Mint Chocolate Dipped Oreos
- Homemade Peanut Butter Cups Recipe
- Chocolate Covered Caramel
- Christmas Candy Recipes
- More Candy Recipes
- More Easy Dessert Recipes
These Chocolate Covered Coconut Balls are part chocolate truffle, part homemade Mounds bar and 100% absolutely delicious. They are smooth, creamy, chocolatey and totally addicting!



Such a fantastic idea for Christmas. I bet this would look wonderful on my Holiday table. I will save the recipe and give them a go. Thanks!
This candy turned out great! It is the first candy that I have made that I thought turned out pretty enough to be giftable!