


These Snowman Christmas Candy Apples are delicious, adorable and certain to be the topic of conversation at your next holiday party. This recipe will teach you how to make, dip, and decorate the perfect homemade caramel apple complete with a chocolate top hat and smile.
Jump to:
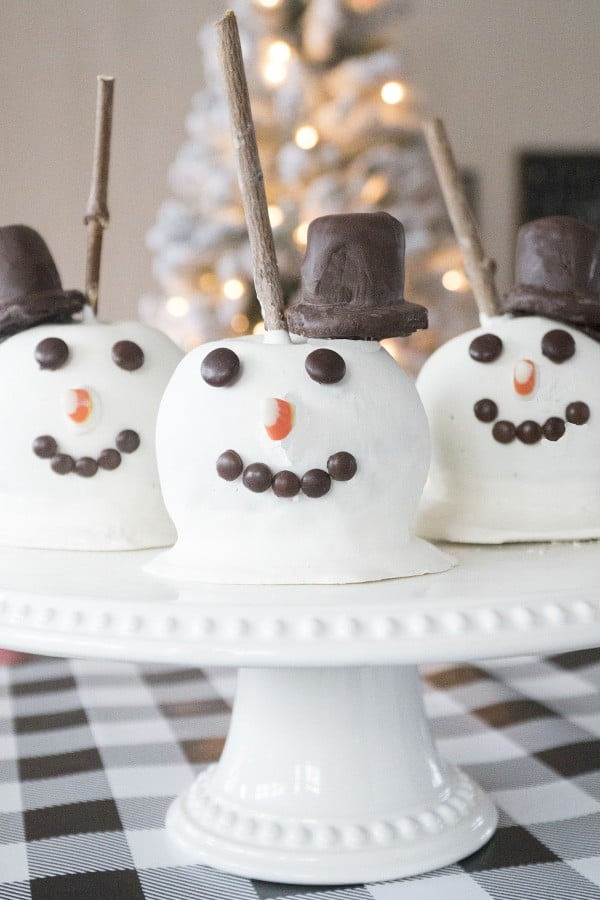
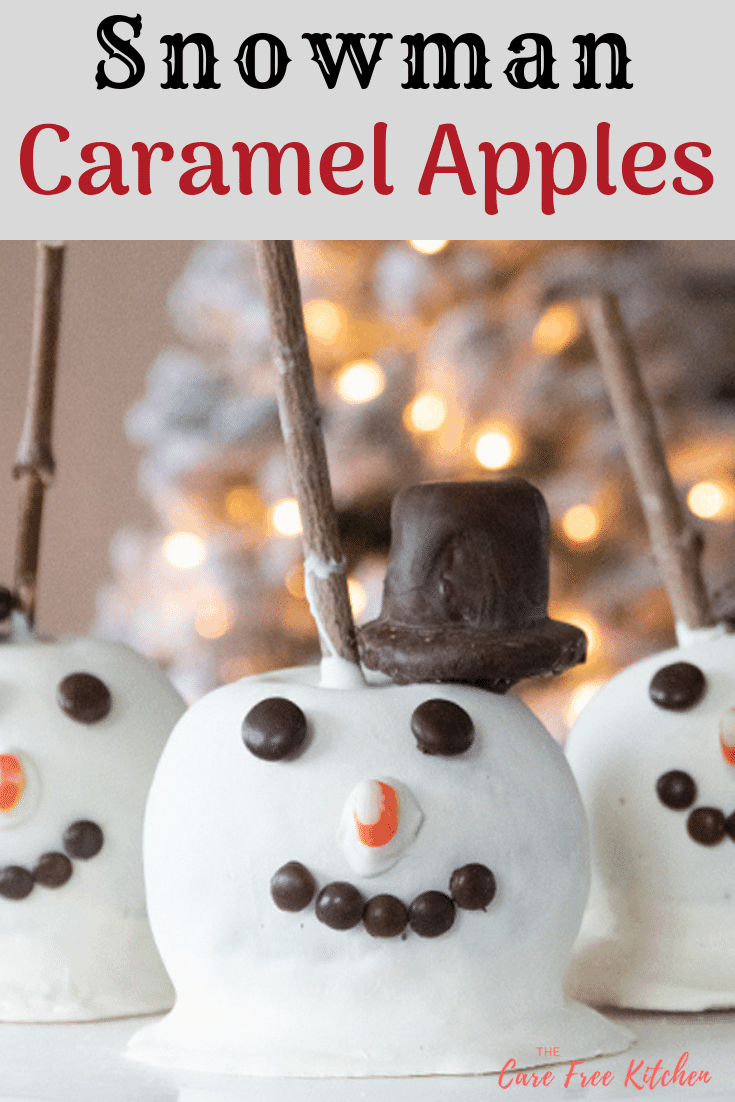
Snowman Christmas Candy Apples
These adorable Snowman Christmas Caramel Apples take gourmet candy apples to the next level. In fact, if you have been to Walt Disney World during the holidays in recent years, you may have seen something similar. Underneath that cute top hat and face, you’ll notice a layer of creamy white chocolate which is hiding a smooth, buttery and crisp homemade caramel apple. These little guys are perfect for displaying at holiday parties, or putting into individual cellophane bags and giving away as gifts.
While this recipe does take a bit of time to prepare, we’re not going to leave you out to dry. Not only will this recipe guide you through making and decorating these caramel apples, we also have a complete guide on How to Make Homemade Caramel Apples. Below you will also find ideas for substitutions and answers to your most frequently asked questions. You can do it!
Snowman Christmas Apple Ingredients
- Apples - any crisp, tart apples such as Granny Smith, Fuji or Honeycrisp work great. If you use apples that have a waxy layer, you’ll need to soak them in a water and vinegar solution as directed in the instructions.
- Sticks - you can use popsicle sticks, lollipop sticks or even clean sticks from your yard.
- Butter - you can use either salted or unsalted butter, depending on your own personal taste.
- Sugar - regular white granulated sugar.
- Brown Sugar - you can use either light or dark brown sugar. Dark brown will have a little stronger molasses flavor than light brown.
- Karo Syrup - if you can’t find Karo Syrup, you can substitute light corn syrup.
- Sweetened Condensed Milk - this adds sweetness and keeps the caramel super creamy.
- Vanilla Extract - pure vanilla extract has the best flavor.
- Salt - we like to use sea salt best.
- Chocolate Wafers - you’ll need white chocolate wafers to dip the caramel apples along with either dark or milk chocolate wafers for making the snowman hats and sticking on the M&Ms for the face.
- Marshmallows - these are for making the snowman hats, so you’ll want to use the regular large marshmallows.
- Oreo Cookies - you really only need the cookie part, so any flat cookie that is roughly the same size would work great.
- M&Ms - these are used to create the eyes and smile. You’ll use a tiny bit of melted chocolate as the “glue” to stick them on. You could also carefully pipe the face using frosting or icing.
How to Make Caramel Christmas Apples
Prep the Apples
- Wash. Wash apples to remove any wax by soaking in a half gallon of water with 1 cup of white vinegar for about 10 minutes. Use your hands to gently rub off any wax residue. Rinse the apples in cold water, then dry completely with a dish towel or paper towel.
- Add sticks. Remove the stem of each apple and insert a wooden dowel or stick into the top, about ¾ of the way through.
Make the Recipe for Homemade Caramel
- Bring ingredients to a boil. In a large non-stick Dutch oven pot over medium heat/med low heat, add the butter and melt. Add sugar, brown sugar, Karo syrup and sweetened condensed milk . Bring to a boil while stirring constantly. (Hint: it helps to use a square wooden spoon so you can scrape the bottom of the pan while stirring, making sure it doesn't burn)
- Cook to 240 degrees F. Stir constantly while cooking at a rapid boil. Use a candy thermometer to monitor the temperature and cook until it reaches 240 degrees F. Watch closely and do not cook higher than 240 degrees F or the caramel will be too thick for the caramel apples.
- Let cool slightly. Take the caramel off the heat and stir in the salt and the vanilla, then let the caramel cool for about 5 minutes.
Dip the Apples
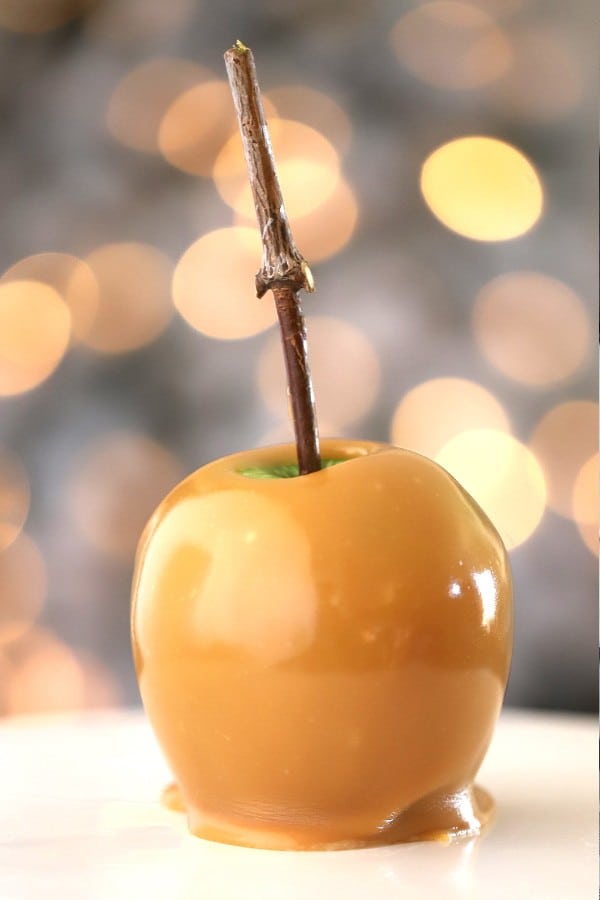
- Dip in caramel. Carefully take each apple by the stick and dip into the hot caramel all the way up to the stick, then lift it out of the caramel and swirl gently to let the excess caramel drip back into the pot. Once dipped, set each caramel dipped apple onto your prepared baking sheet. Repeat with the remaining apples, letting the caramel cool to room temperature.
- Dip in white chocolate. Melt white chocolate as directed. Take a completely set caramel apple, hold it by the stick and dip into the white chocolate, tilting the bowl if necessary to submerge the entire apple. Once coated, remove from the chocolate, give a couple of gentle shakes to remove excess and place back down on your Silpat lined sheet tray. Repeat with the rest of the apples, then allow to set completely at room temperature.
Decorate each Christmas Caramel Apple
- Melt the chocolate. Place the dark or milk chocolate wafers in a microwave safe bowl and warm for about 30 seconds at a time, stirring in between, until completely melted but not too hot. Set aside.
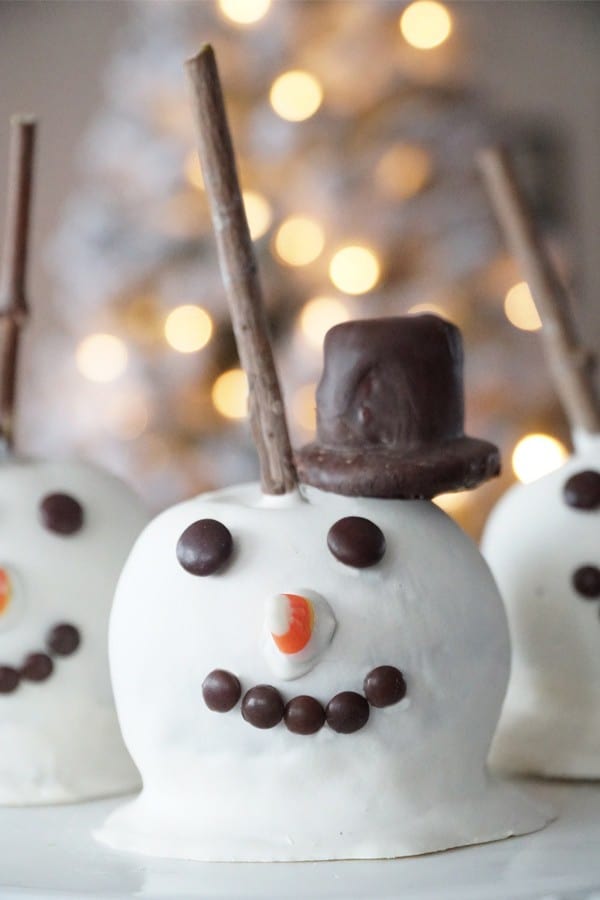
- Make the snowman top hats. Twist apart Oreos, scrape off the frosting and dip each half in the melted dark or milk chocolate. Set on a parchment paper lined sheet tray to cool. Next, stick a toothpick into the top of a large marshmallow, dip completely into the same melted chocolate, and place onto the center of a chocolate-dipped Oreo half. Repeat until all chocolate "top hats" are dipped.
- Make the snowman face. Use brown M&Ms to make the Snowman's eyes and smile. Using your fingers, dip one into chocolate slightly just to get enough to hold it like glue onto the side of the apple. Position as desired and hold for a bit until set. Continue until all Snowman Caramel Apples are decorated.
- Allow to set. Allow to set completely, then store in the fridge (loosely covered) for up to 3 days, or enjoy immediately!
Tips For Making Christmas Candy Apples
Making chocolate covered Snowman Candy Apples is a fun and delicious treat, perfect for sharing on your food blog. Here are some tips to ensure your candy apples turn out beautifully:
- Choose the Right Apples: Select firm, crisp apples that are not overly ripe. Tart apples like Granny Smith or sweet apples like Gala work well. Make sure they are clean and dry before dipping.
- Prepare Your Workstation: Set up your workspace with parchment paper or a silicone baking mat to place the dipped apples on. Have all your toppings and decorations ready in separate bowls for easy access.
- Melt Chocolate Correctly: Melt the chocolate gently using a microwave or a double boiler. Stir frequently to prevent overheating and burning. Overheated chocolate can become lumpy or grainy.
- Dip Evenly: Hold the apple by the stick and dip it into the melted chocolate, swirling and rotating to coat evenly. Use a spatula or knife to help spread the chocolate if needed. Allow excess chocolate to drip off.
- Store Properly: To keep your chocolate-covered candy apples looking their best, store them in a cool, dry place. If they'll be out for a while, you can wrap them in cellophane or clear treat bags.
- Practice and Have Fun: Making candy apples may take a bit of practice to get them just right. Don't be discouraged if your first ones aren't perfect. Experiment with different toppings and enjoy the process!
Frequently Asked Questions
Wilton brand white chocolate wafers are made for melting and dipping. They are incredibly user friendly and can be found in many grocery stores or craft stores. You can also use white chocolate chips, but if you go this route you’ll want to add about 1 teaspoon of coconut oil. Chocolate chips have extra ingredients added to them that keep them from melting down to a fluid chocolate, meaning it would be too thick to dip your apples into all on its own.
Chocolate wafers melt really well in the microwave, as long as you follow a couple of easy tips. Since chocolate burns so easily, you only want to heat for about 30 seconds at a time. Always be sure to stir in between, even if it doesn’t look like the chocolate wafers have melted at all. Once your chocolate is almost completely melted, with just a few chunks, you may want to drop down to 20 seconds and test on your fingers to make sure it isn’t too hot.
If you are having trouble getting the melted chocolate to stick your M&Ms to the apples, the chocolate may be too warm. Try waiting until it cools down a bit, or toss it into the fridge for a few minutes to cool it down. The thicker and cooler it gets, the easier it will be to stick the candies onto the caramel apples.
Storing
- Refrigerator: store your Snowman Caramel Apples in the fridge, loosely covered with plastic wrap, for up to 3 days.
- Room Temperature: you can also store your Snowman Caramel Apples, loosely covered with plastic wrap, in a cool, dark spot at room temperature for up to 2 days.

Snowman Christmas Caramel Apples
Ingredients
Homemade Caramel For Caramel Apples
- 1 cup Butter
- 1 cup Sugar
- 1 cup Karo Syrup
- 1 cup Brown Sugar light or dark
- ¼ teaspoon Salt
- 1 14-oz can Sweetened Condensed Milk
- 1 teaspoon Vanilla Extract
To Decorate Snowman Caramel Apples
- 8 Granny Smith Apples
- 8 Sticks popsicle, lollipop or similar
- 3 cups White Chocolate Wafers
- 2 cups Dark Chocolate Wafers
- 8 large Marshmallows
- 8 Oreo Cookies separated with frosting removed
- 2 cups Brown M&Ms
Instructions
Prepping the Apples
- Wash apples to remove any wax by soaking in a half gallon of water with 1 cup of white vinegar for about 10 minutes. Use your hands to gently rub off any wax residue. Rinse the apples in cold water, then dry completely with a dish towel or paper towel.
- Remove the stem of each apple and insert a wooden dowel or stick into the top, about ¾ of the way through.
- Prepare a baking sheet by either spraying with non-stick cooking spray or using a Silpat.
Making the Easy Caramel Recipe
- In a large non-stick Dutch oven pot over medium heat/med low heat, add the butter and melt. Add sugar, brown sugar, Karo syrup, salt and sweetened condensed milk . Bring to a boil while stirring constantly. (Hint: it helps to use a square wooden spoon so you can scrape the bottom of the pan while stirring, making sure it doesn't burn)
- Stir constantly while cooking at a rapid boil. Use a candy thermometer to monitor the temperature and cook until it reaches 240 degrees F. Watch closely and do not cook higher than 240 degrees F or the caramel will be too thick for the caramel apples.
- Take the caramel off the heat and stir in the salt and the vanilla, then let the caramel cool for about 5 minutes.
Dipping the Apples in Caramel
- Carefully take each apple by the stick and dip into the hot caramel all the way up to the stick, then lift it out of the caramel and swirl gently to let the excess caramel drip back into the pot.
- Once dipped, set each caramel dipped apple onto your prepared baking sheet. Repeat with the remaining apples, letting the caramel cool to room temperature.
Dipping the Apples in White Chocolate
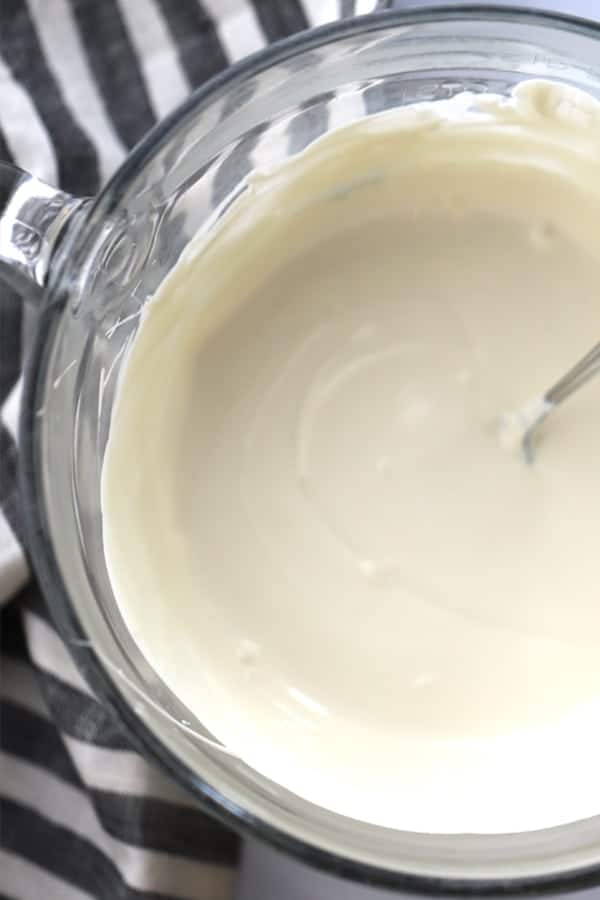
- Place the white chocolate wafers in a microwave safe bowl and warm for about 30 seconds at a time, stirring in between, until completely melted but not too hot. White chocolate burns easily so make sure you are only warming as much as needed to melt the chocolate.
- Take a completely set caramel apple, hold it by the stick and dip into the white chocolate, tilting the bowl if necessary to submerge the entire apple.
- Once coated, remove from the chocolate, give a couple of gentle shakes to remove excess and place back down on your Silpat lined sheet tray. Repeat with the rest of the apples, then allow to set completely at room temperature.
Adding Snowman Decorations
- Place the dark or milk chocolate wafers in a microwave safe bowl and warm for about 30 seconds at a time, stirring in between, until completely melted but not too hot. Set aside.
- To make the Snowman hats: Twist apart Oreos, scrape off the frosting and dip each half in the melted dark or milk chocolate. Set on a parchment paper lined sheet tray to cool. Next, stick a toothpick into the top of a large marshmallow, dip completely into the same melted chocolate, and place onto the center of a chocolate-dipped Oreo half. Repeat until all chocolate "hats" are dipped.
- To make the Snowman face: Use brown M&Ms to make the Snowman's eyes and smile. Using your fingers, dip one (logo side) into chocolate just enough to get it to hold it like glue. Position as desired and hold for a bit until set. Continue until all Snowman Caramel Apples are decorated.
- Allow to set completely, then store in the fridge (loosely covered) for up to 3 days, or enjoy immediately!
Nutrition
More Caramel Recipes You Will Love
- Caramel Apple Crisp
- Homemade Caramel Apples
- Caramel For Dipping Apples
- Caramel Apple Punch
- Homemade Caramel Candy
- Caramel Monkey Bread
- How to Make Caramel Popcorn
- Caramel Pecan Pie
- Caramel Cream Cheese Apple Dip
- Best Caramel Dessert Recipes
- More Dessert Recipes
- More Christmas Recipes
If you’ve tried this recipe, please rate it and leave a comment on this post. I love hearing feedback from you. It helps me and other readers too! If you love Pinterest, feel free to leave a comment and photo there too. Also, if you like to share, use the hashtag #thecarefreekitchen on Instagram and tag me @thecarefreekitchen so I can find you and give your post some love. You can also find me on Facebook at The Carefree Kitchen. Thank you!!
These Snowman Caramel Apples are as tasty as they are adorable. Serve at your next holiday party or wrap individually in cellophane for a unique homemade gift.
Leave a Reply